
Welcome to the journey of transformation where we breathe new life into the heart of your kitchen worktops! Whether you’re grappling with stains, scratches, or just a dull, lifeless surface, this guide should be super helpful to bring your kitchen countertops new life.
Kitchen worktops aren’t just functional spaces; they are the canvas of your culinary adventures and the centrepiece of your kitchen’s aesthetic.
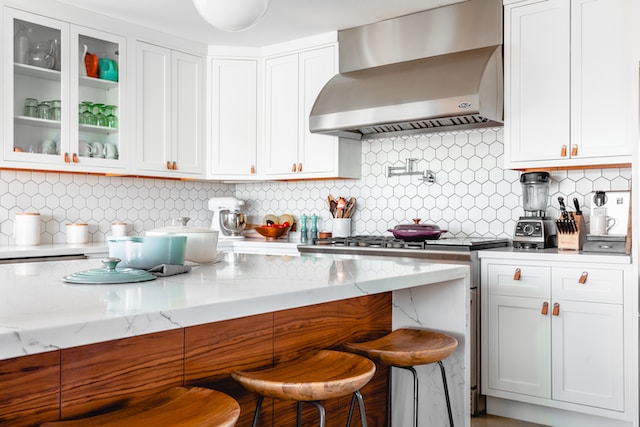
Restoring wooden worktops requires using the appropriate grit sandpaper and tools, along with an oil or wax sealant application.
In this comprehensive guide, we’ll navigate the exciting world of worktop restoration. We’ll explore various materials, from classic wood and elegant granite to modern quartz and sleek marble, and provide tailored advice for each. Our expert tips will empower you to tackle common issues like staining, chipping, and wear and tear with confidence.
The kitchen worktops we will look at restoring will be Painted, Laminated, Wooden and Tile. So roll up your sleeves, and let’s turn those restoration dreams into reality!
Paint Kitchen Worktops Restoration
As there are various surfaces to select from for kitchen worktops, it is crucial that you choose one that will be easy to care for and last a long time. Solid surfaces like marble, granite, and quartz tend to be durable yet simple to maintain; their wide selection of colours and finishes makes them suitable for any décor style.
Revitalising painted kitchen worktops can be a satisfying DIY project that transforms the entire look of your kitchen. Whether you’re dealing with chipped paint, fading colours, or just fancy a change, here’s a step-by-step guide to get your painted worktops looking as good as new.
1. Preparation is key.
- Clean the Surface: Start by thoroughly cleaning your worktop. Use a mild detergent and warm water to remove any grease, dirt, and grime. Dry it completely with a soft cloth.
- Sand the Surface: Gently sand the worktop with fine-grit sandpaper. This step is crucial for removing the glossy finish and ensuring that the new paint adheres properly.
2. Repair any damage:
- Fill in Gaps: If there are any cracks or chips, fill them with a suitable wood filler. Once dried, sand the area smooth, blending it into the rest of the worktop.
3. Prime for Perfection:
- Apply primer: Use a high-quality primer suitable for your worktop material. Primer helps in achieving a smooth, even base for the paint to adhere to. Let it dry as per the manufacturer’s instructions.
4. Choose the Right Paint:
- Select High-Quality Paint: Opt for paints designed for kitchen use, as they are more durable and resistant to moisture and heat. Acrylic and latex paints with a semi-gloss or gloss finish are often recommended for their ease of cleaning and durability.
5. Painting with precision:
- Apply paint evenly. Use a foam roller for a smooth finish. Apply the paint in thin, even coats to avoid drips or streaks. Allow the paint to dry completely between coats. Typically, two to three coats are sufficient for a robust finish.
6. Seal for Durability:
- Apply a Sealer: Once the paint is completely dry, seal the worktop with a non-toxic, food-safe sealant. This step is crucial for protecting the paint from wear and tear and making the surface easier to clean.
7. Maintaining Your Restored Worktop:
- Regular Cleaning: Clean spills immediately and use mild cleaners to avoid damaging the paint.
- Avoid direct heat: Use trivets or mats to protect the worktop from hot pots and pans.
8. Embrace the change:
- Enjoy Your New Space: Step back and appreciate the transformation. A freshly painted worktop can dramatically change the ambiance of your kitchen.
Laminate Kitchen Worktops Restoration

Laminate worktops are another economical and repairable choice, which makes them great for budget-conscious consumers. Being water-resistant with an antimicrobial surface protectant that keeps spills, splashes, and stains at bay is also ideal; simply wipe down with a damp cloth after each use to maintain its brand new appearance! Laminated surfaces are typically composed of heavy-duty paper and melamine resin, covered with an attractive decorative layer to complete their aesthetic appeal. Laminate comes in various colours and patterns—woodgrain included!—to match any kitchen decor, as well as being highly durable against impacts, scuffs, scratches, and heat damage, making it the ideal solution for busy family kitchens.
Laminate worktops are a popular choice in many kitchens due to their affordability and variety of designs. However, over time, they can show signs of wear and tear. Fear not! Restoring laminate worktops is straightforward and can bring a fresh, new look to your kitchen. Here’s how to do it:
1. Assess the Damage:
- Inspect the Surface: Before you start, assess the condition of your laminate. Look for scratches, burns, stains, or peeling areas.
2. Cleaning the Surface:
- Deep Clean: Use a mild detergent and warm water to thoroughly clean the worktop. Avoid abrasive cleaners as they can scratch the laminate. Dry the surface with a clean cloth.
3. Sanding for a Smooth Base:
- Light Sanding: Gently sand the surface with fine-grit sandpaper to remove any gloss and create a texture that will help the paint adhere better. Wipe away the dust after sanding.
4. Repairing Minor Damages:
- Fill Scratches and Chips: Use a laminate filler or a similar product to fill in any scratches or chips. Once dry, sand the area smoothly, ensuring it’s level with the rest of the surface.
5. Applying Primer:
- Prime the Surface: Apply a good quality primer that is suitable for laminate surfaces. Let it dry completely as per the instructions.
6. Painting the Worktop:
- Choose Suitable Paint: Select a paint that’s designed for laminate surfaces. These paints are usually more durable and resist wear and tear.
- Paint Application: Use a roller for an even finish. Apply the paint in thin layers, allowing each layer to dry completely before applying the next. Typically, two coats are enough.
7. Sealing for Protection:
- Apply a Sealant: Once the paint is dry, seal the worktop with a non-toxic, food-safe sealant for durability. This will also make the surface easier to clean and maintain.
8. Maintenance Tips:
- Routine Cleaning: Use a soft cloth and mild detergent for daily cleaning. Avoid harsh chemicals.
- Prevent Damage: Use cutting boards to prevent scratches and avoid placing hot items directly on the surface.
9. Enjoy Your Restored Worktop:
- Admire Your Work: Step back and appreciate the transformation. Your restored laminate worktop can give your kitchen a completely new and refreshed look.
Tile Kitchen Worktops Restoration
Tile worktops make an attractive addition to kitchens as they come in various colours, shapes, and designs. Not only is it highly durable but cleaning it is simple. Unfortunately, it can chip or crack over time, so regular sealing of your worktops may be required to protect it from these risks.
Tile kitchen worktops add a unique charm and character to any kitchen. However, over time, tiles can become dull, grout can darken or stain, and chips may appear. But don’t fret! Restoring tile worktops is a manageable task that can greatly enhance the look of your kitchen. Here’s a step-by-step guide to revitalise your tiled surfaces.
1. Start with a Thorough Clean:
- Deep Clean Tiles and Grout: Begin by cleaning the tiles and grout lines with a mixture of warm water and mild detergent. For tougher stains, use a mixture of baking soda and water. Avoid harsh chemicals that can damage the tiles.
2. Address Grout Issues:
- Re-grouting if Necessary: If the grout is severely stained or crumbling, consider re-grouting. Remove the old grout with a grout saw and apply new grout. Choose a colour that complements your tiles.
3. Repairing Chips and Cracks:
- Tile Repair: For chips or cracks in the tiles, use a tile repair kit that matches your tile colour. Carefully fill in the damaged areas and let it set as instructed.
4. Re-seal the Tiles:
- Sealing for Protection: If your tiles are unglazed or the sealant has worn off, apply a new layer of tile sealant. This will protect the tiles from stains and moisture.
5. Enhancing the Shine:
- Polish the Tiles: After the tiles are clean and repaired, use a tile polish to enhance their shine. Apply the polish with a soft cloth and buff it in a circular motion.
6. Maintaining Your Restored Tiles:
- Regular Cleaning: Clean spills immediately to prevent staining. Use a soft cloth or sponge with a mild cleaner.
- Avoid Abrasives: Don’t use abrasive cleaners or scrubbers that can scratch the tile surface.
7. Admiring Your Revived Worktop:
- Enjoy the Transformation: Stand back and admire the refreshed look of your tile worktop. The restored shine and clean grout lines can make a significant difference in your kitchen’s appearance.
Wooden Kitchen Worktops Restoration
Wooden worktops bring warmth and natural beauty to a kitchen, but over time they can become worn, scratched, or stained. Restoring a wooden worktop is not just about repairing damage; it’s about preserving and enhancing the wood’s natural charm. Here’s how to restore your wooden worktops to their former glory:
1. Assess the condition:
- Inspect the wood: Look for any significant damage like deep scratches, burns, or stains. Understanding the extent of wear will help you determine the restoration process.
2. Cleaning the surface:
- Thorough Cleaning: Clean the surface with a mild detergent and warm water. Avoid harsh chemicals that can strip the wood of its natural oils. Dry the worktop thoroughly after cleaning.
3. Sanding the wood:
- Sand Down Imperfections: Start with a medium-grit sandpaper to remove the top layer of finish and any minor scratches. Then, use fine-grit sandpaper to smooth the surface. Always sand in the direction of the wood grain to avoid scratches.
4. Repairing deeper damages:
- Fill Scratches and Dents: Use a wood filler that matches the colour of your worktop to fill any deeper scratches or dents. Once dry, sand the area smoothly.
5. Re-oiling or refinishing:
- Choose Your Finish: Depending on the original finish of your worktop, you may need to re-oil or re-varnish the wood. Oiling is ideal for penetrating and protecting the wood, while varnishing creates a hard, protective layer on the surface.
- Apply the Finish: Apply the oil or varnish with a clean cloth or brush, following the manufacturer’s instructions. Allow ample time for the finish to dry between coats.
6. Sealing the wood:
- Apply a Sealant: If you’ve chosen to varnish your worktop, the varnish will act as a sealant. If you’ve oiled the worktop, you can apply a specific wood sealant for extra protection.
7. Maintaining Your Restored Worktop:
- Regular Oiling: Regularly oil the worktop every few months to keep it hydrated and protected.
- Immediate Spill Cleanup: Clean spills immediately to prevent staining and damage to the wood.
- Use Protective Mats: Use mats or trivets under hot dishes and avoid cutting directly on the worktop.
8. Enjoy the renewed beauty:
- Admire the Transformation: A restored wooden worktop can dramatically enhance the warmth and beauty of your kitchen. Enjoy the renewed look and feel of your kitchen centrepiece.
Refinishing worktops
Refinishing worktops is an affordable alternative to full kitchen remodelling, saving your home both money and time while helping to reduce landfill waste. Professional services with the necessary skills and tools will ensure that any damaged areas are restored seamlessly, while any damaged spots are repaired in a manner that fits seamlessly with their surroundings.

A technology writer specialising in electronics innovation, advanced manufacturing systems, and infrastructure development. Oliver is committed to breaking down complex engineering topics into clear, insightful analysis for professionals and enthusiasts alike.

